I was always fairly amused with the fractals created by the chaos game. Given the current state of things, I thought it would be good to stay busy and keep my programming skills active. This time I wrote implementations for/in: Python, C# .Net console app, and Javascript.
The chaos game is not actually a board or video game, but rather a small algorithm usually performed by a computer. The key steps are:
- Start with a set number of fixed corner points. These points can be picked randomly or the corner vertices of a well known shape such as a triangle or square can be used.
- Next find a starting point. Any particular point can be used
- Then the following steps are done over and over again (or until a maximum number of iterations is reached):
- Randomly pick a fixed corner point
- Determine the line from the current (or starting point) to the picked corner point
- Create a new point (and plot it) at the mid point of the line found in the previous step. This point is now the current/starting point for the next iteration.
The above steps are nicely summarized in this video:
The Good and bad with the standard algorithm…
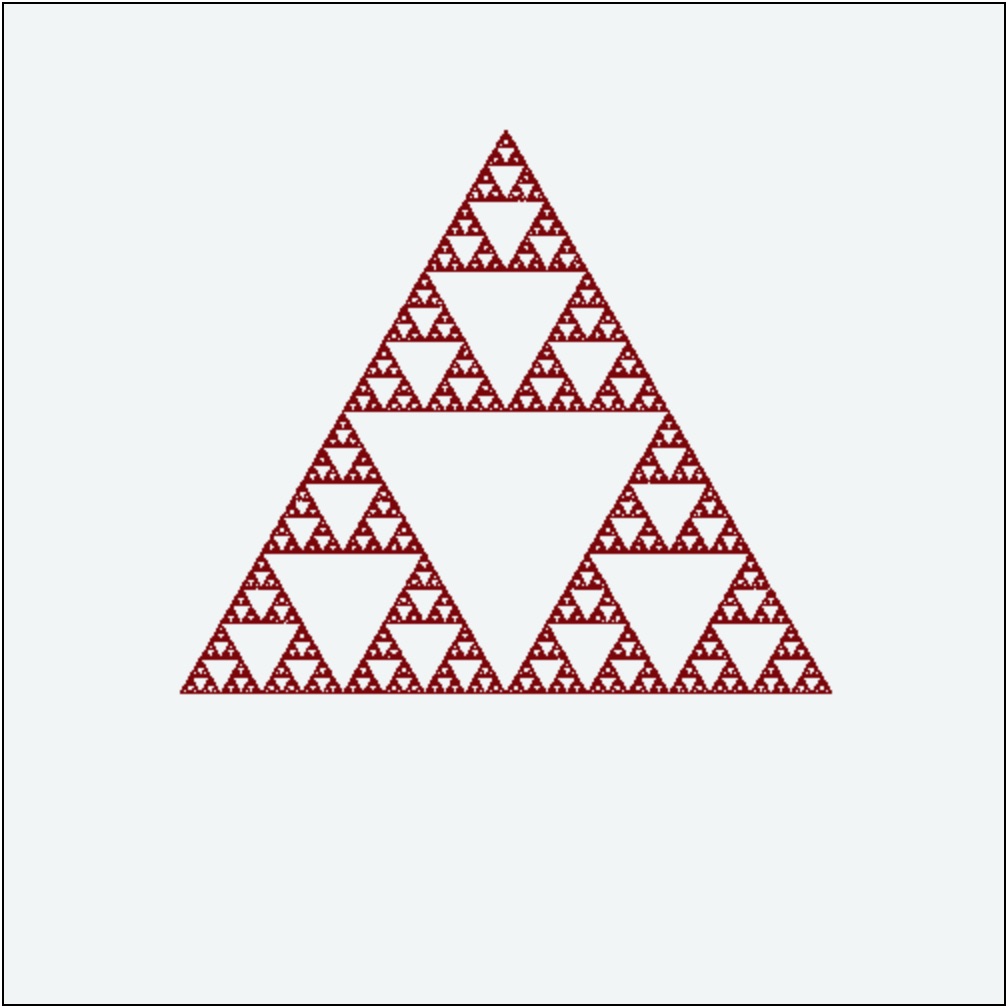
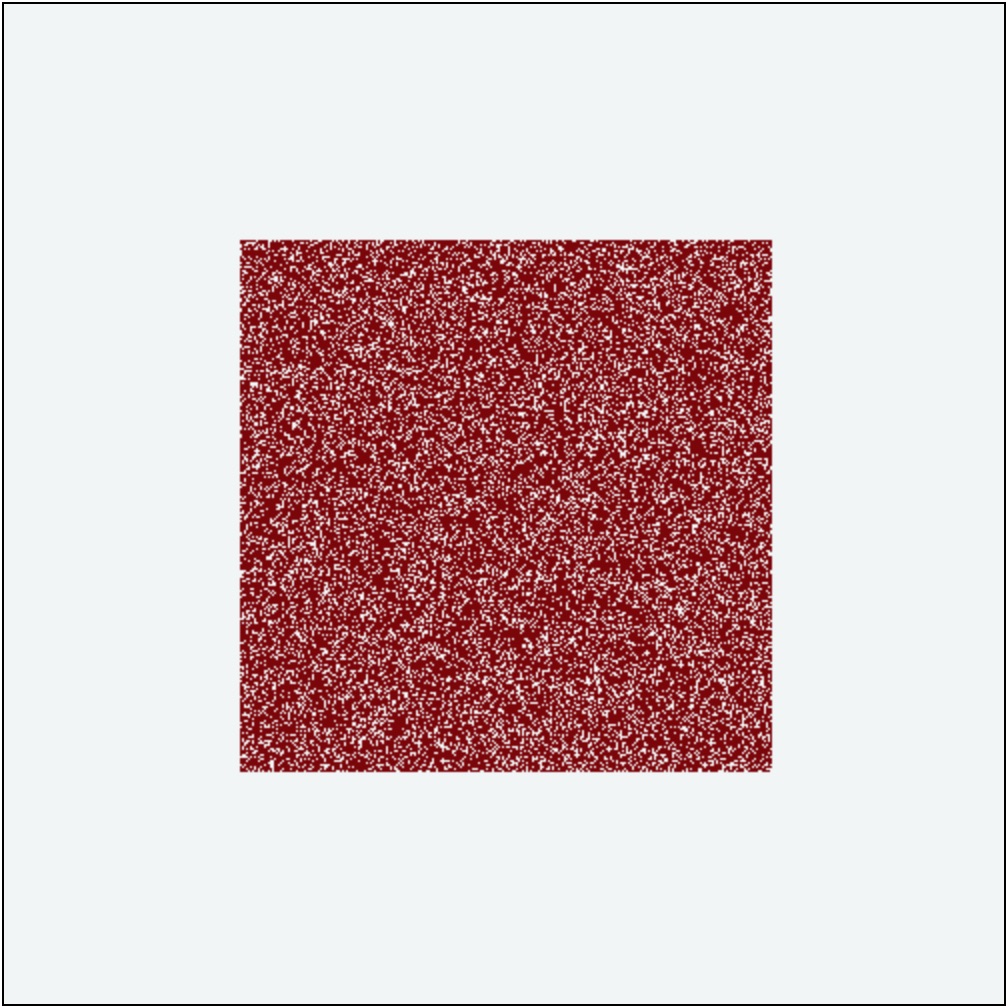
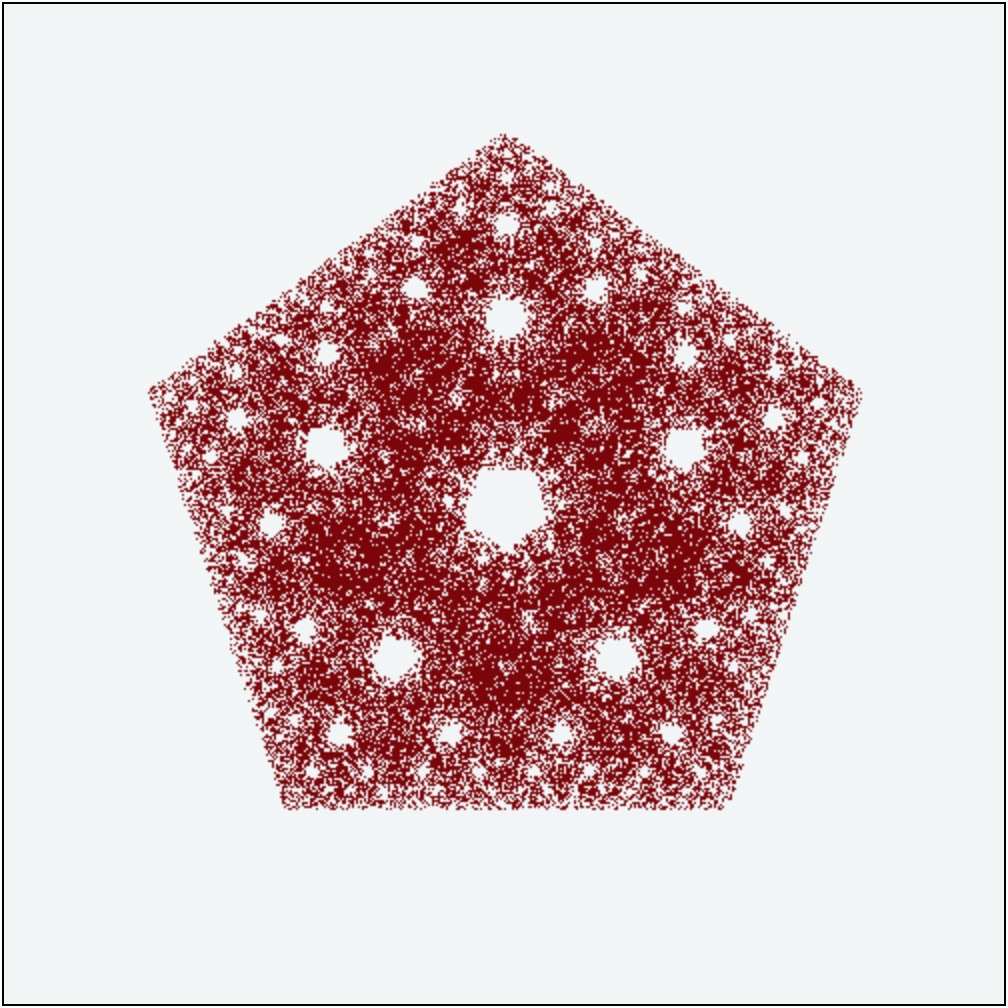
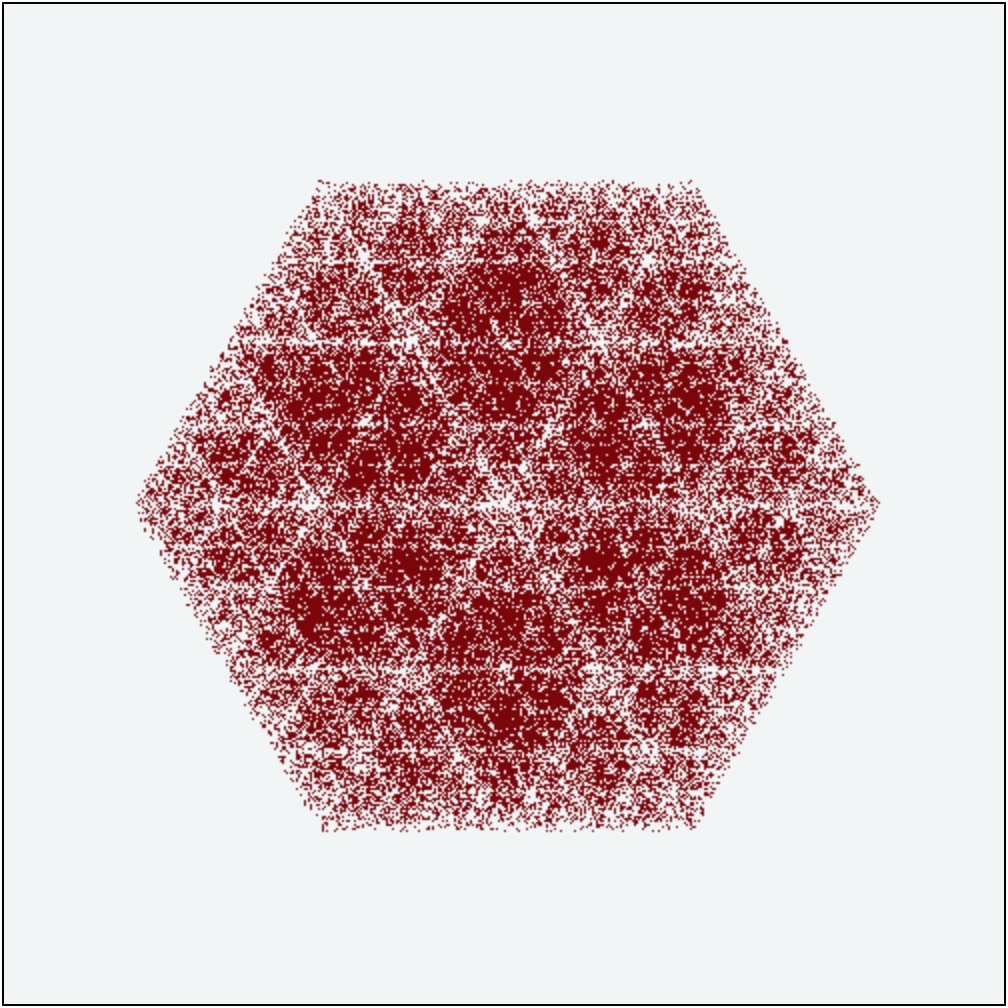
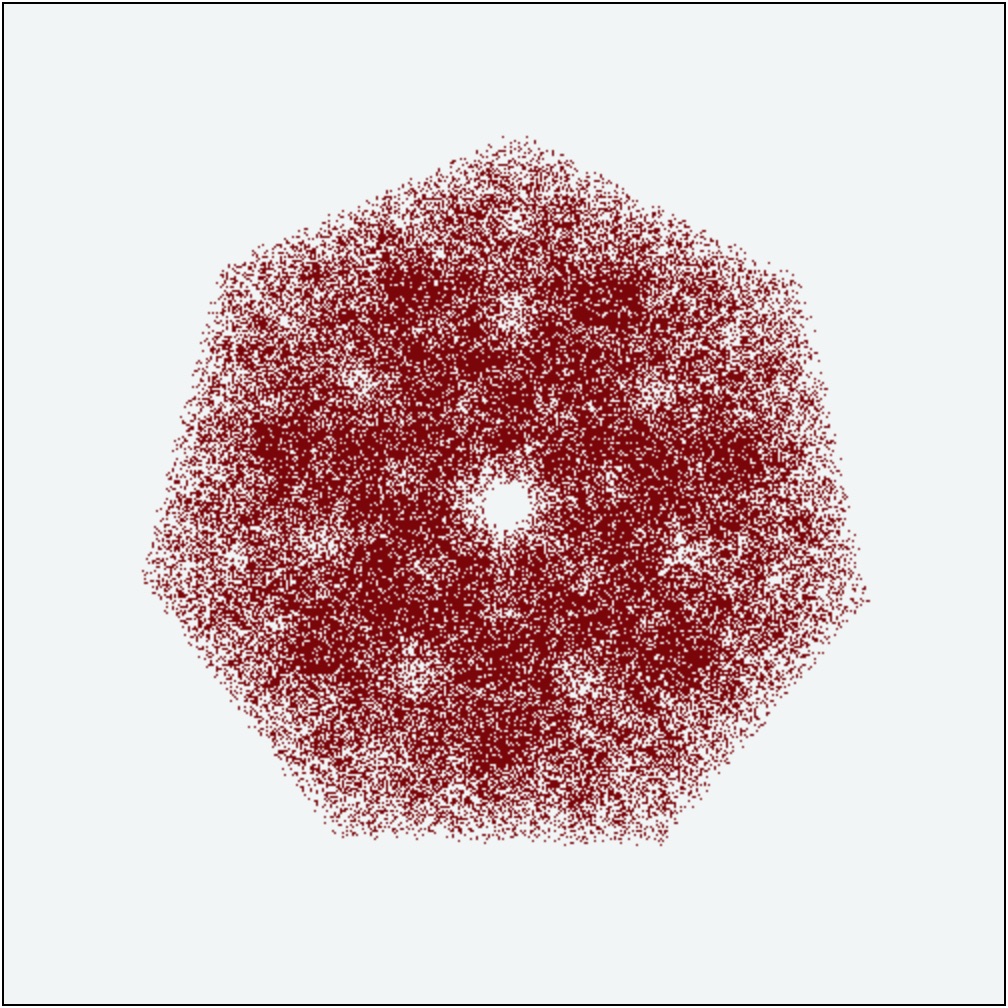
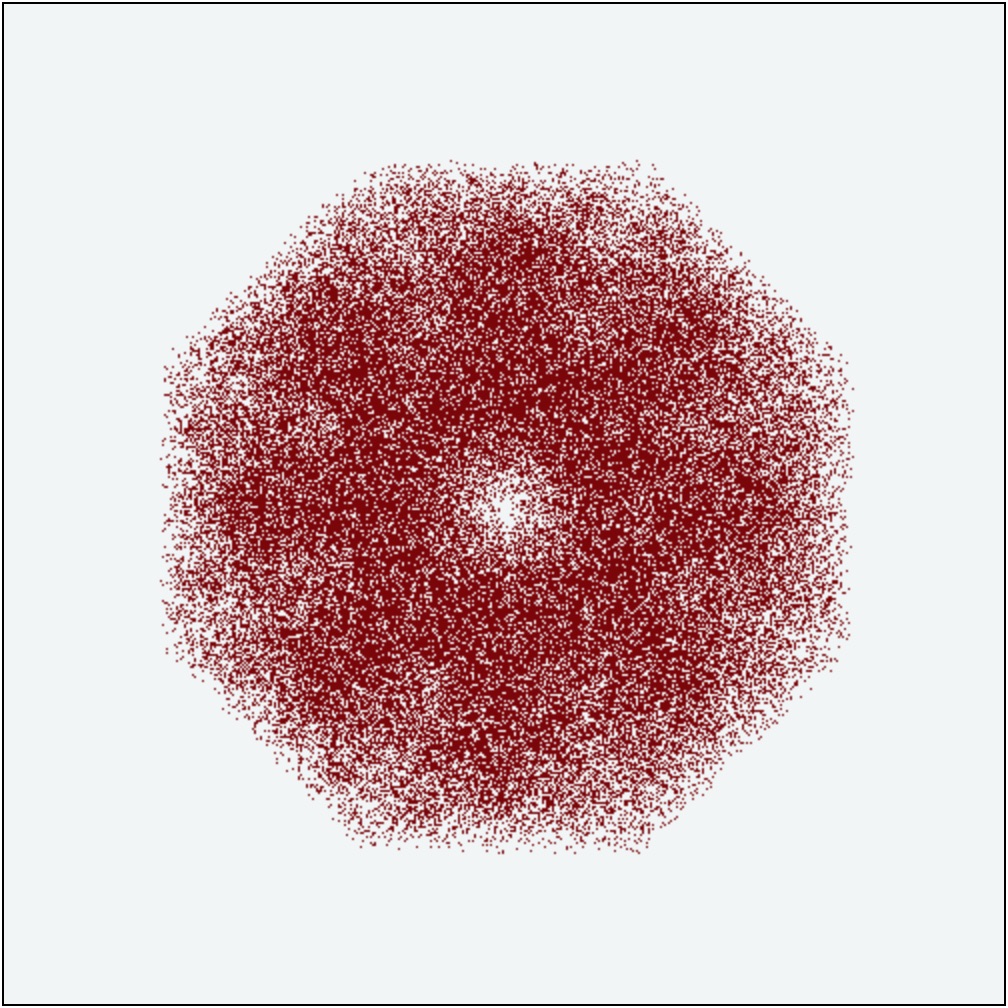
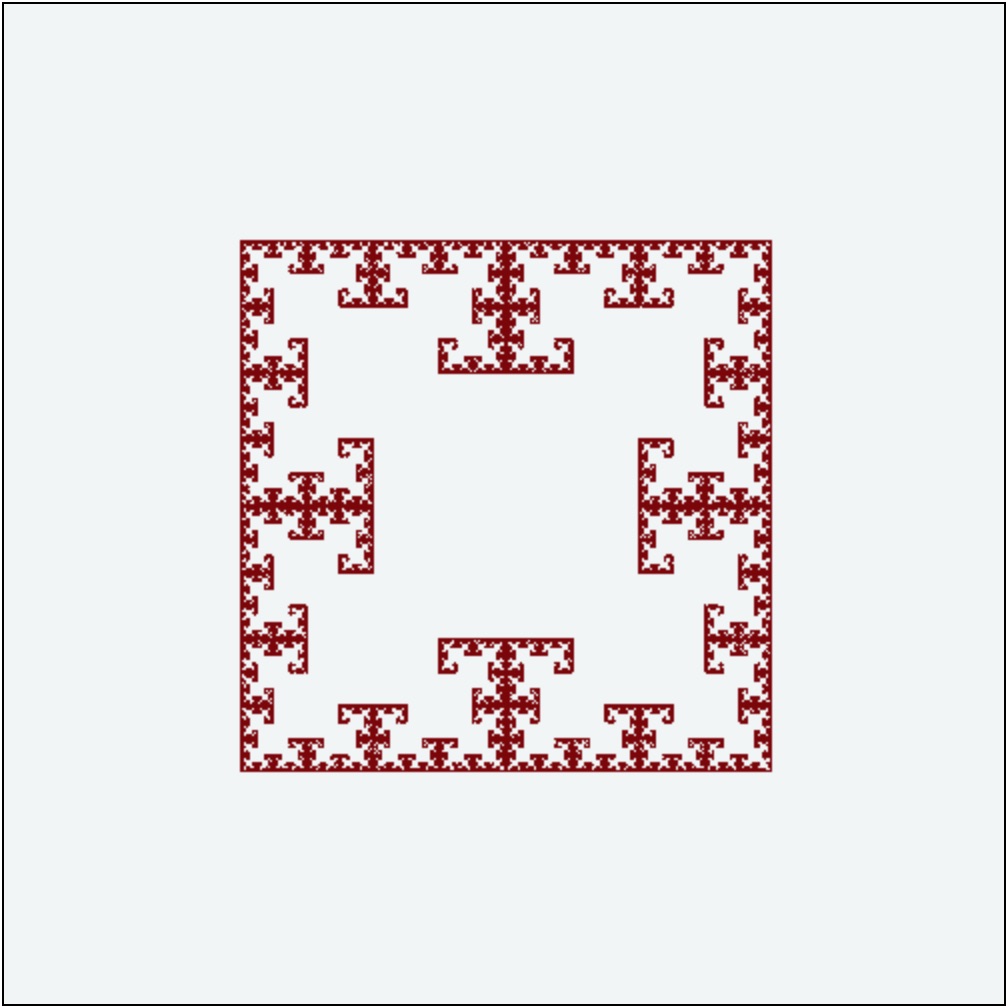
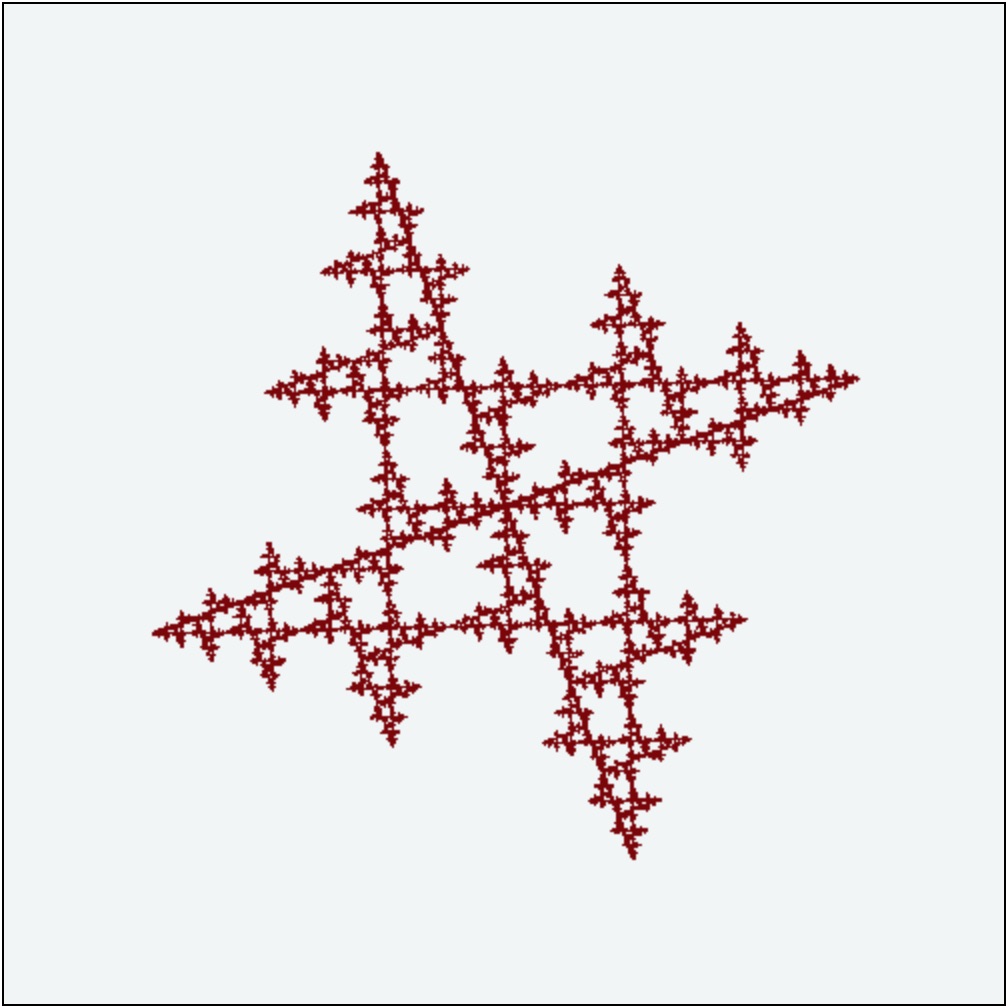
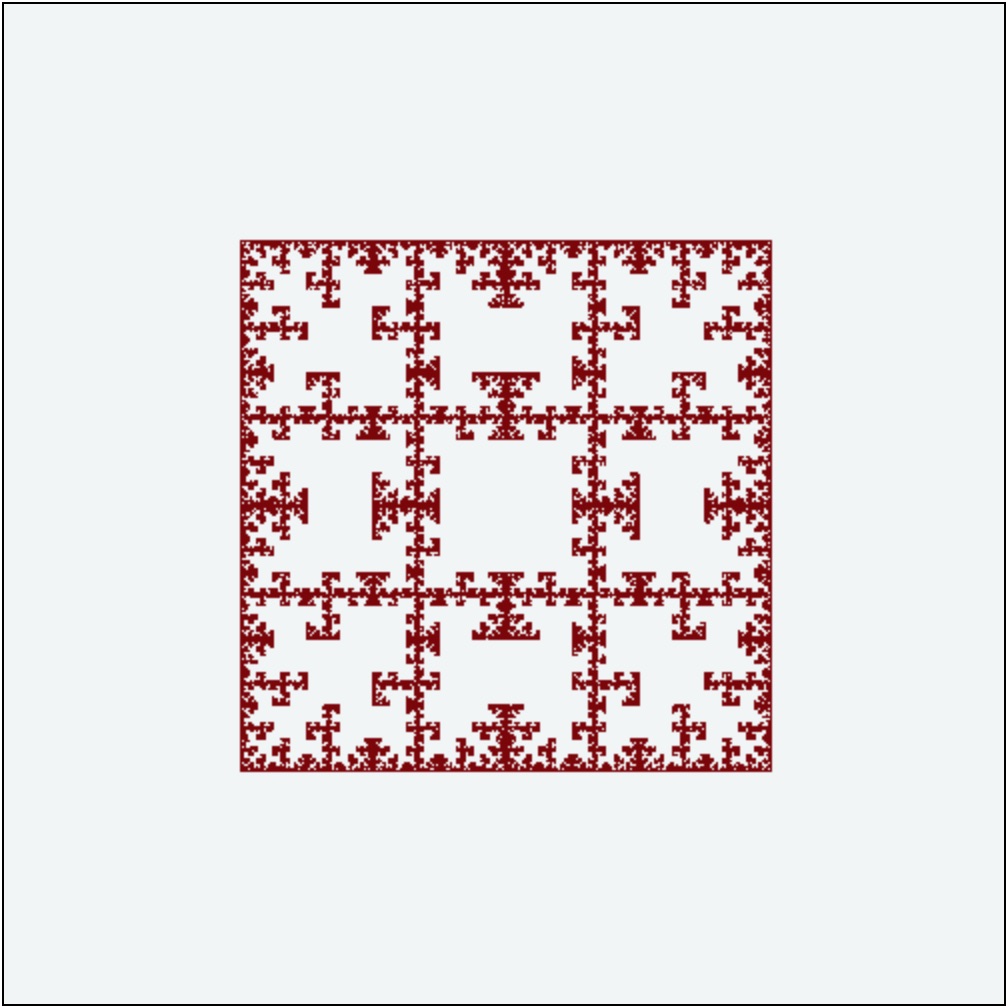
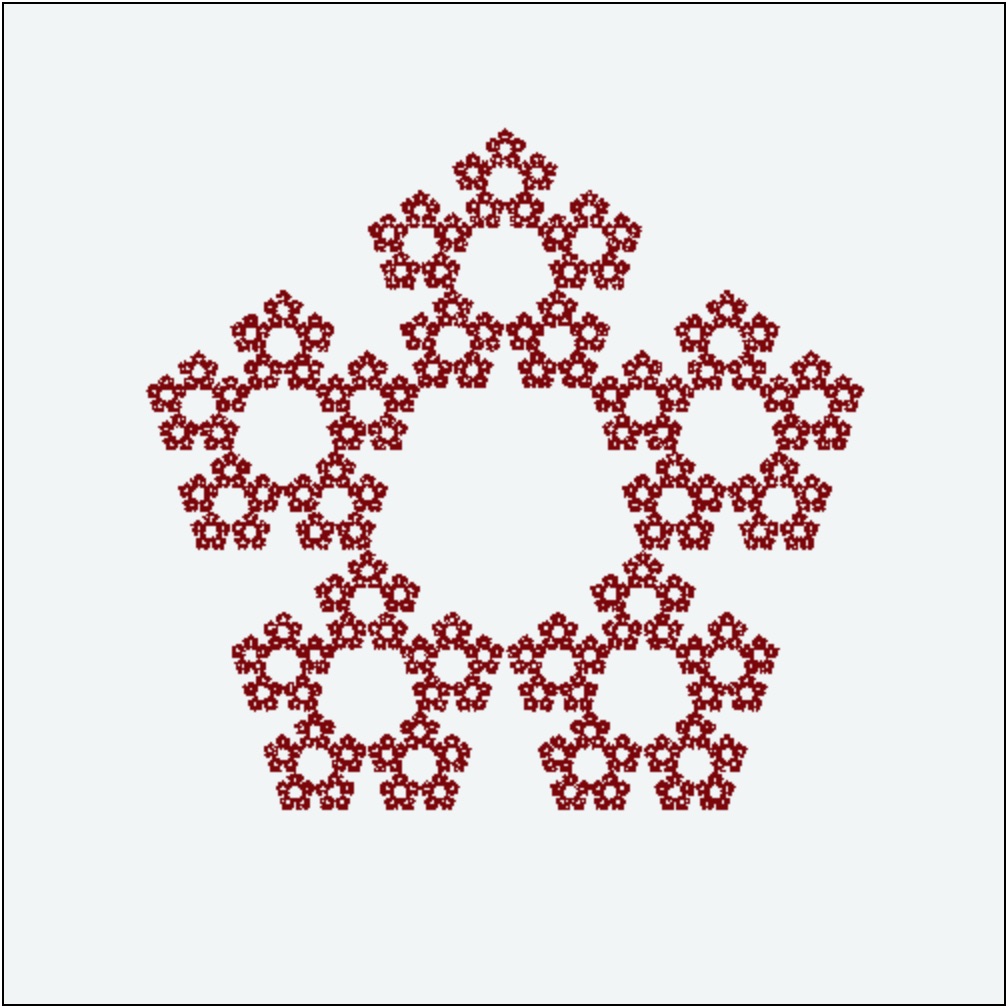
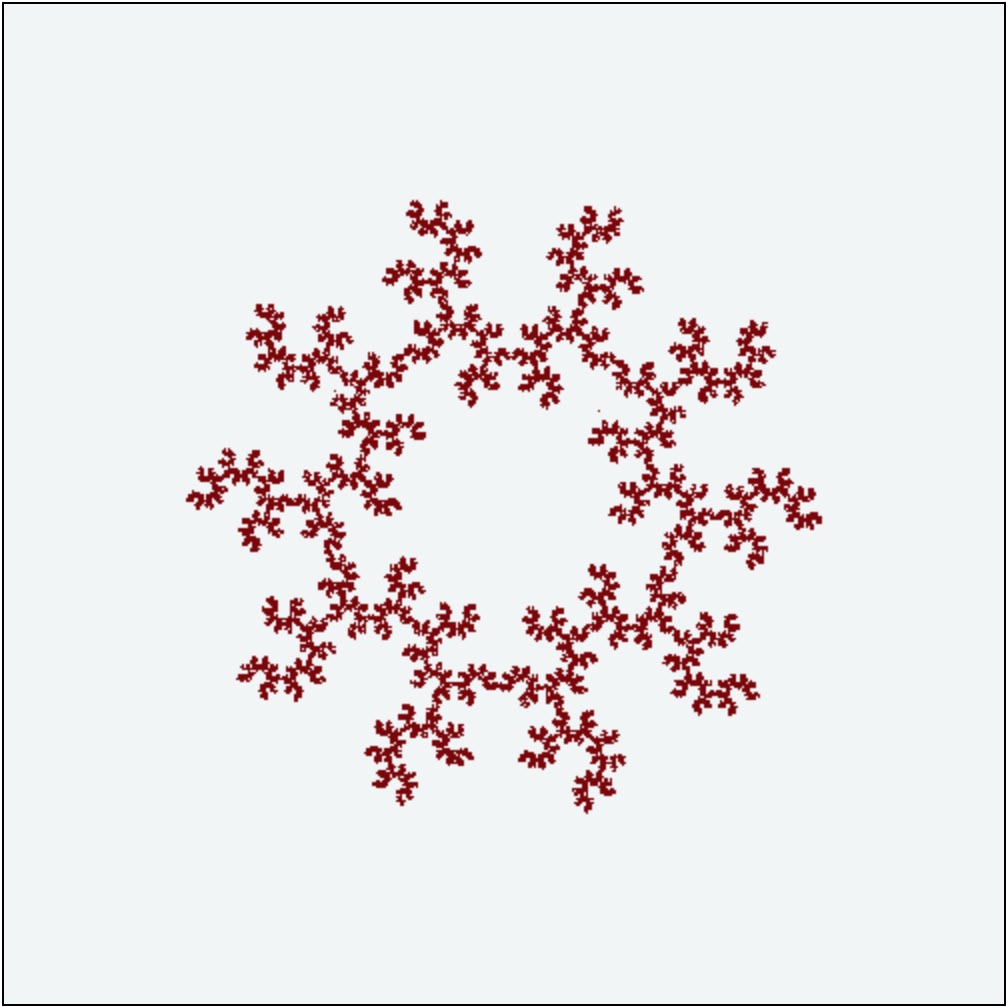
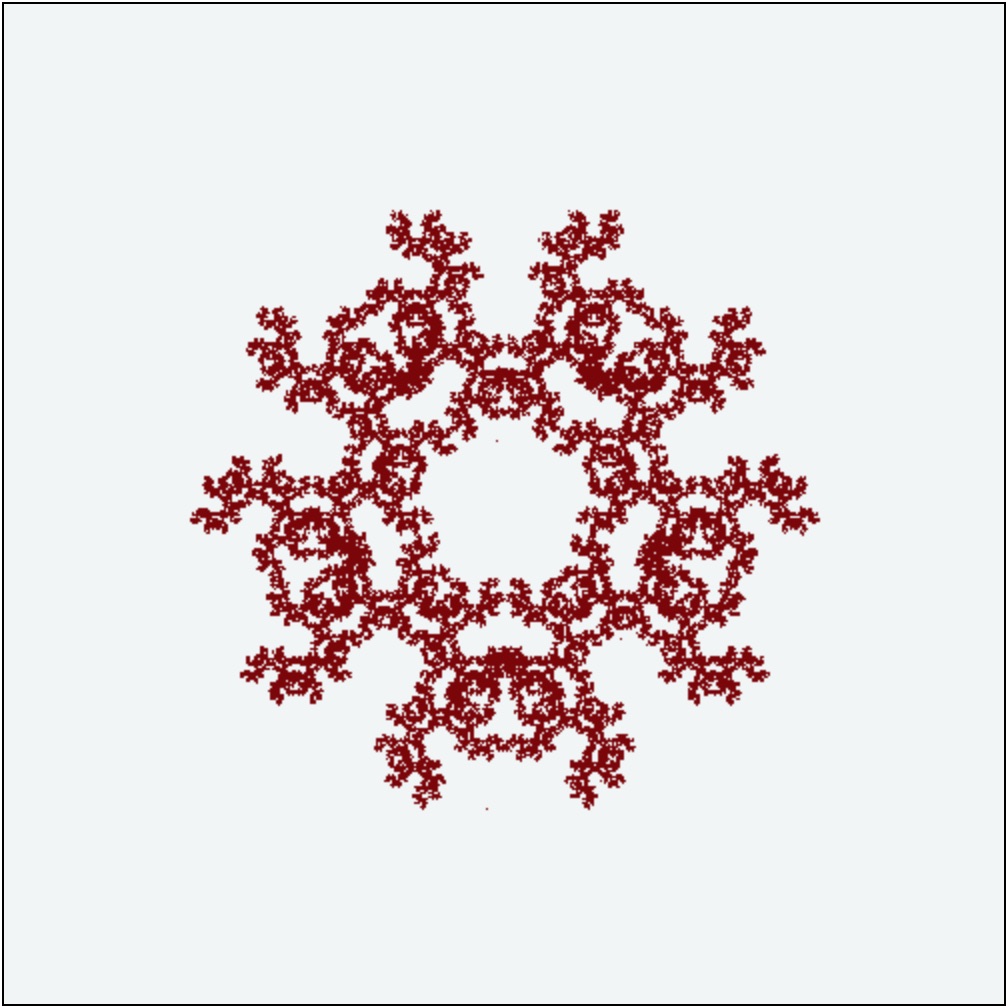
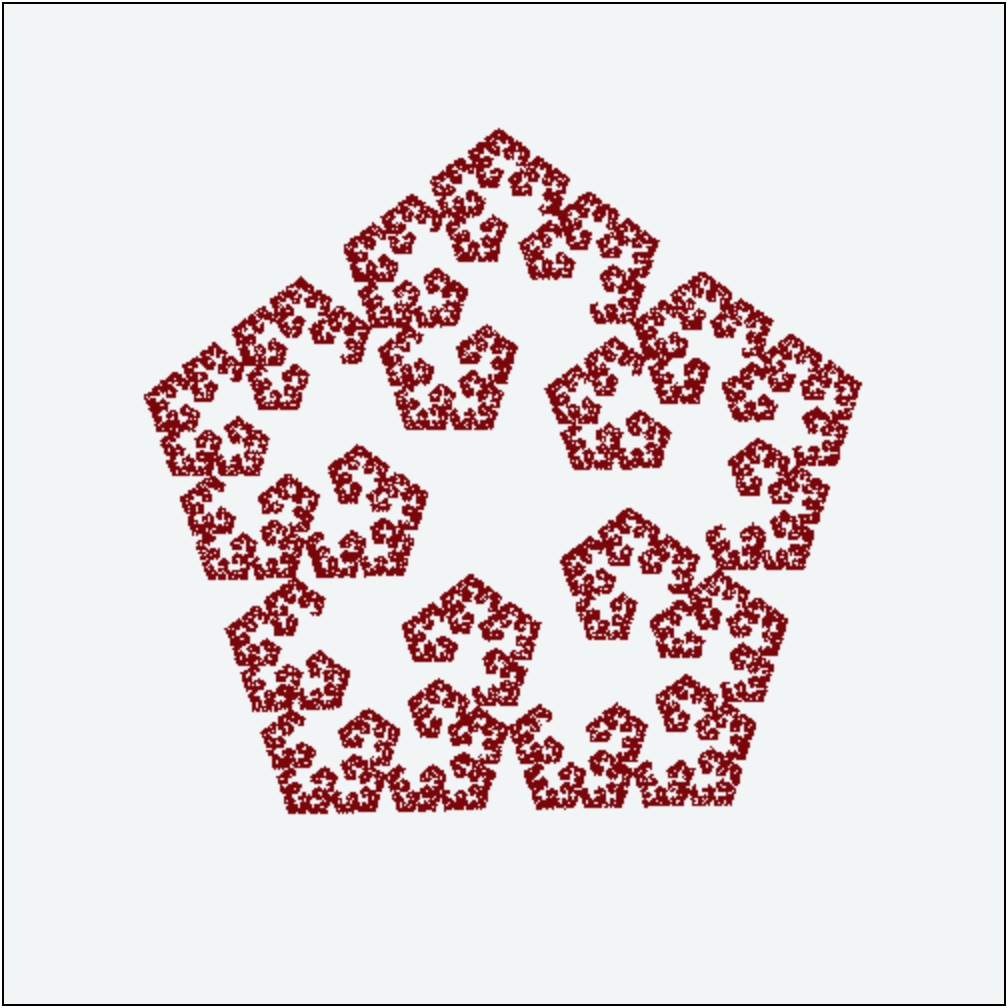
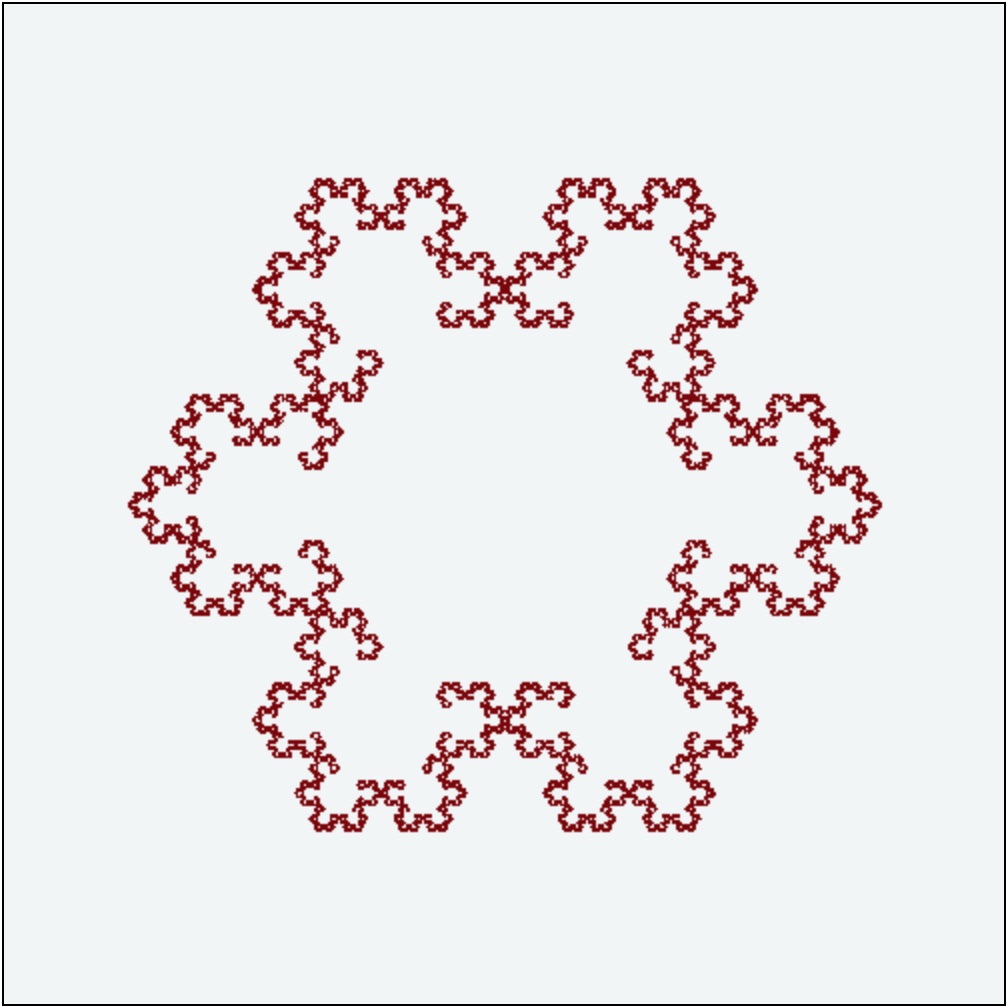
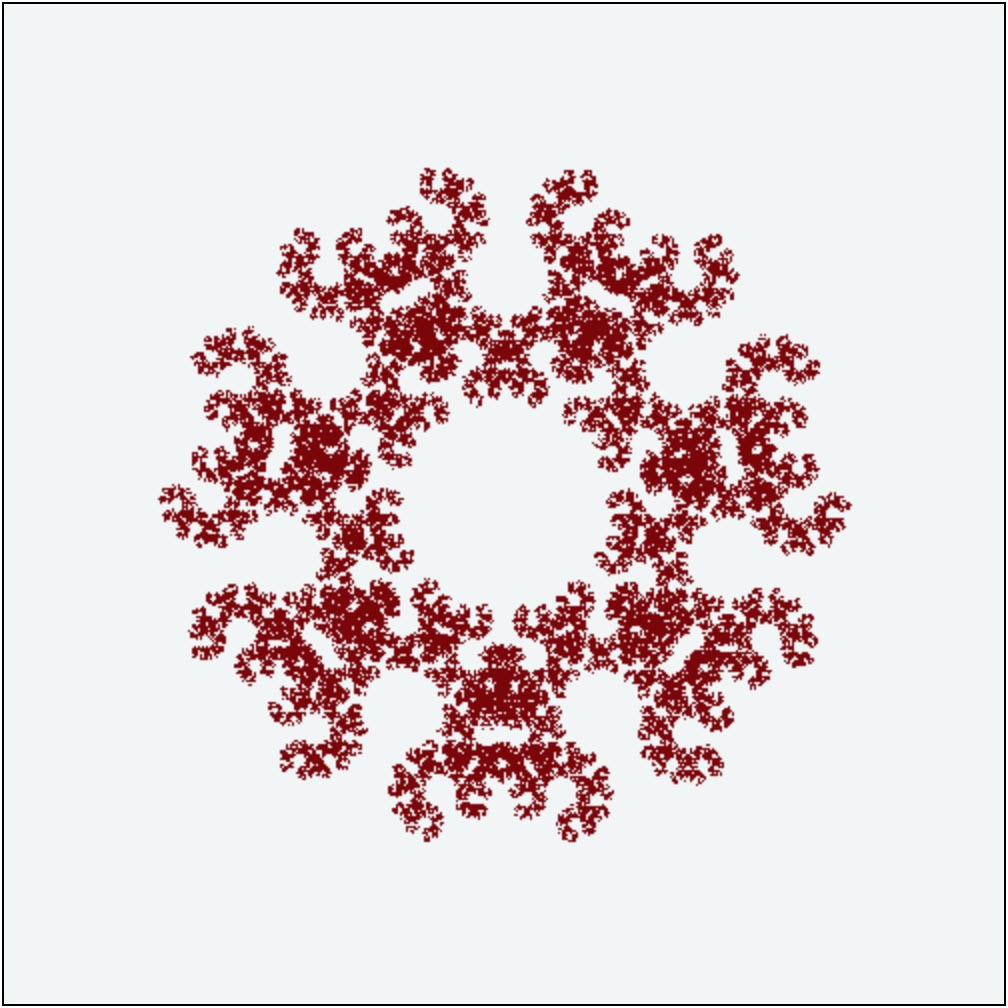
The standard algorithm that was listed in the above section can successfully create the Sierpinski gasket/triangle, however it produces less ‘well formed’ results when dealing with more than 3 corners points, all of which can be seen below.
Variations to the standard algorithm…
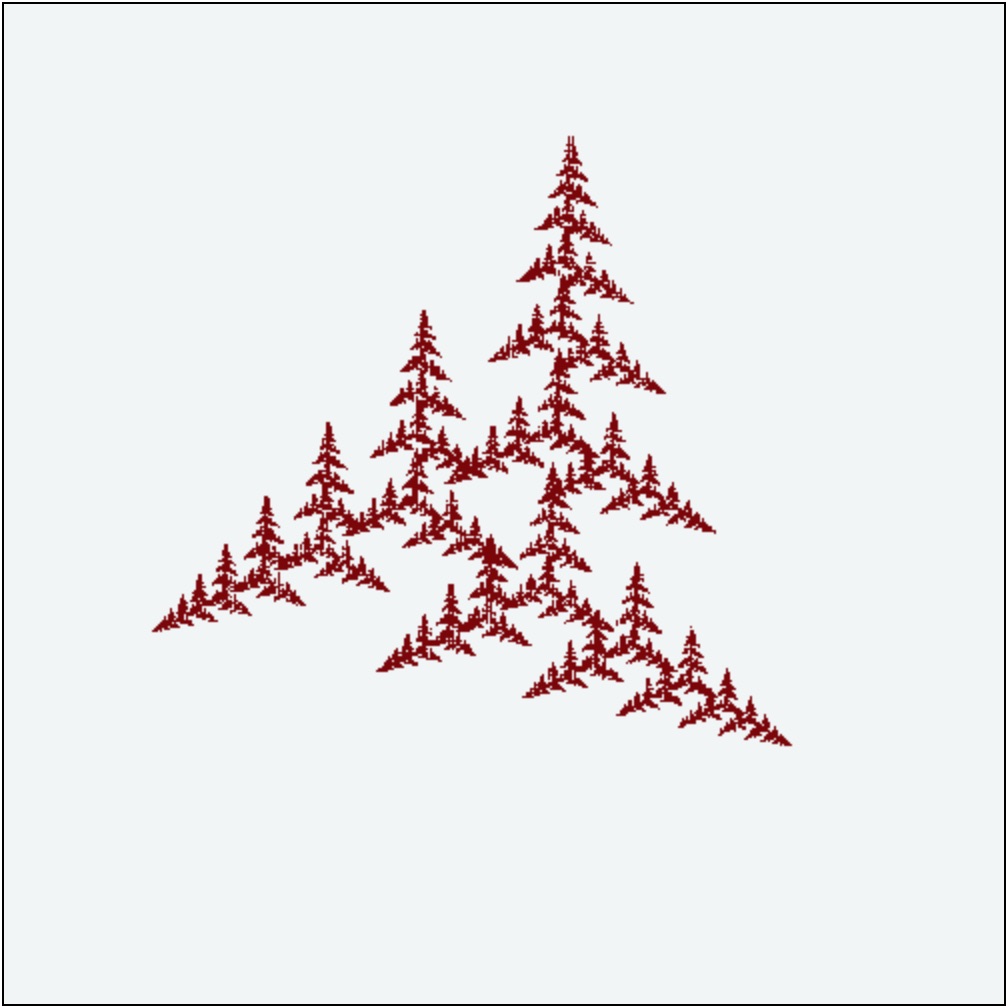
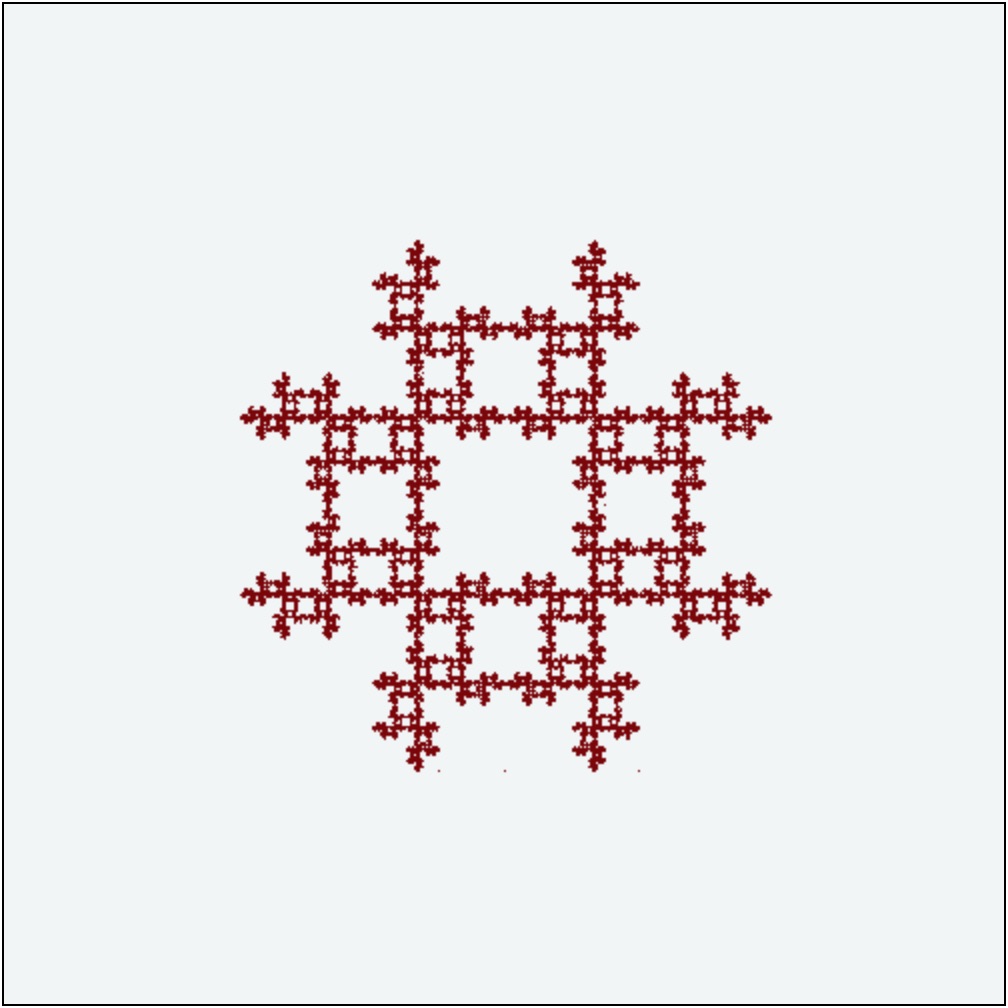
Two small changes to the algorithm can be added which will make the results a bit more ‘interesting’.
First, the simplest change is to locate the new point at a position other than the midpoint between the current and selected corner points. Mathematically, we can say that instead of of using a fixed value of one half, we can allow any fraction between 0 or 1. In out code we call this factor the multiplier.
Next we can add in some rules with how the corner points are selected. Instead of pure random selection, we can have random picks with some ‘constraints’. A variety of rules can be included, however we have chose the following:
- Rule 1: standard behaviour, that is no change
- Rule 2: do not randomly pick the previously picked corner
- Rule 3: do not randomly pick the opposite from the previously picked corner
- Rule 4: do not randomly pick the counter clockwise corner from the previously picked corner
- Rule 5: do not randomly pick the clockwise corner from the previously picked corner
- Rule 6: do not randomly pick opposite from the second previously picked corner
- Rule 7: do not randomly pick the counter clockwise corner from the second previously picked corner
- Rule 8: do not randomly pick the clockwise corner from the second previously picked corner
Using these new features, we were able to created the following images:

Implementations
Python
First an implementation was created in Python mainly since it is perhaps the easiest language to write code in at this moment. The main goal was gain an understanding of the algorithm and its variations. Secondly, I think it’s good to keep active with Python and learn about some of the various packages that are available (as in this case the python imaging library or PIL was used).
In the application, to keep things simple, all the parameters are set programmatically. The code is available here.
C# .Net Foundation… Console App
Next a console based app was made using C# .Net Foundation. I would like to get more exposure to C# programming and thought it was healthy to make an implementation with it. The main purpose of this program was to serve as a stepping stone in the process of creating two or three other programs. I wanted to make a nice WPF XAML based application and then a screensaver possibility after that.
The C# .Net Foundation console app is similar to the python app in functionality and usage. The code is available here.
Javascript
Two different javascript implementations were created. First a version was made so that it would be easier to make explanations or demonstrations of how the algorithm works. With this version, one can watch the creation of points and even delay the drawing updates. Also, three states for the starting point can be chosen. Click here to view this version in a separate tab.
Next another version was created that would allow one to explore different combinations of parameters (such as the number of corners, the multiplier, and the type of rule to apply). The result that is drawn is from the final state, that is this version does not display successive point updates, just the result after all of the iterations. As a consequence, this version is much faster than the first version. Click here to view this version in a separate tab.
Finally the code for both versions is available here.
Future Work
Perhaps someday in the future, I would like to comeback to this project and make a Windows version along with a Windows screensaver.
Currently, all the points are coloured by the same amount; that is, it’s either all or nothing in terms of shading. Another future project is to possibly have the ability of shading based on the frequency of how often a particular point is determined.
No Comments